Hardware setup
Setting up your hardware is a series of steps you'll need to go through every time you want to change your wifi credentials. What we aim to do in these steps is opening the wifi hotspot associated with the board so that we can enter our wifi credentials and activation code to connect our board with our application.
At the end of this section, you'll have an activated node on your application that you can use to control the inputs and outputs connected to the board. To setup your hardware, you need to go through the following steps.
Step 1: powering your Tamra IoT board up
There are 3 methods to power up the board. You can pick any, but we'll tell you which method is more convenient for each stage of your project. These methods are:
- Using a USB cable to connect it to your computer/laptop.
- Using an AC-to-DC adapter supplying 7-12V to the power jack.
- Using an external battery to supply 5V into the Vin pin on the board.
You can read more about these methods in this Powering up methods section. For this tutorial, we'll use the first method to power up our board.
On the board end, the cable is inserted into the Micro-USB port shown in the following picture.
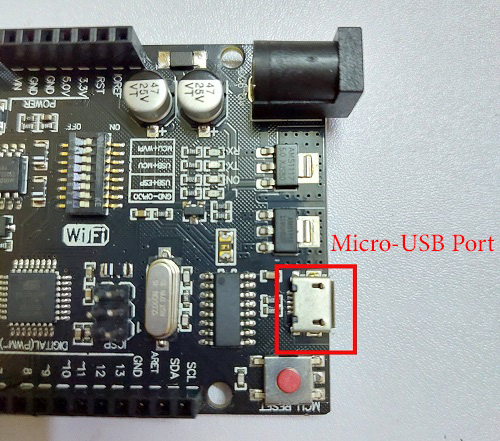
On the computer end, the cable is inserted into a normal USB port.
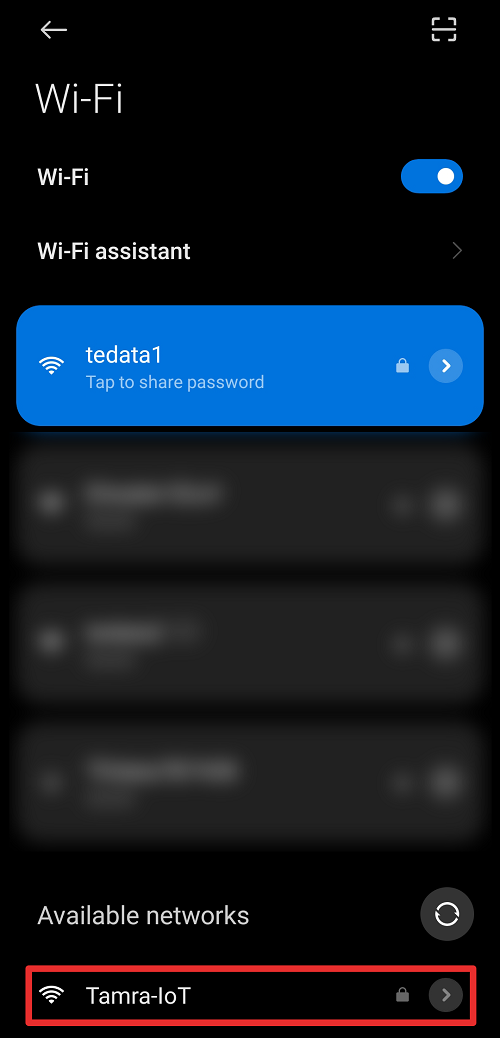
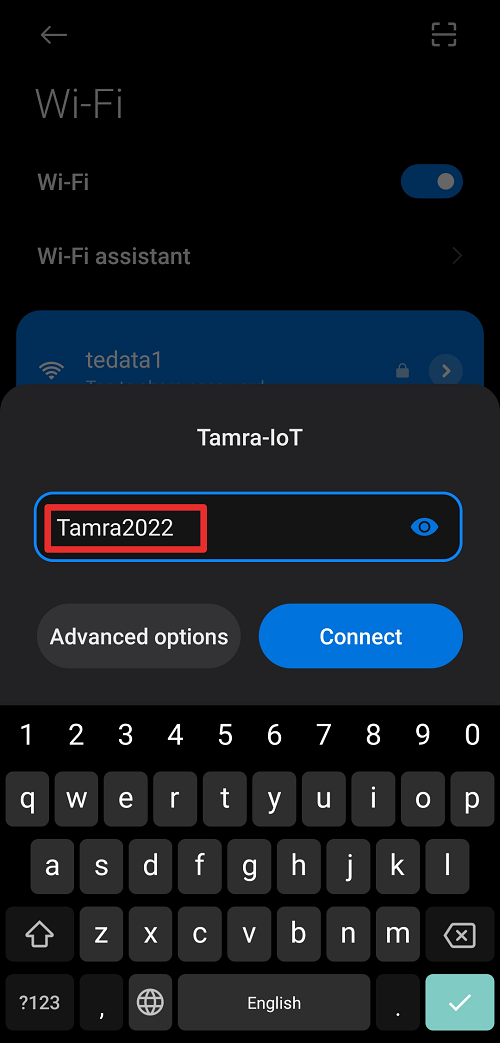
After completing this step, you'll find that a new open wifi named Tamra-IoT appeared in your phone wifi list, the password is of this wifi network is Tamra2022.
Connect to it, then proceed to the next step.
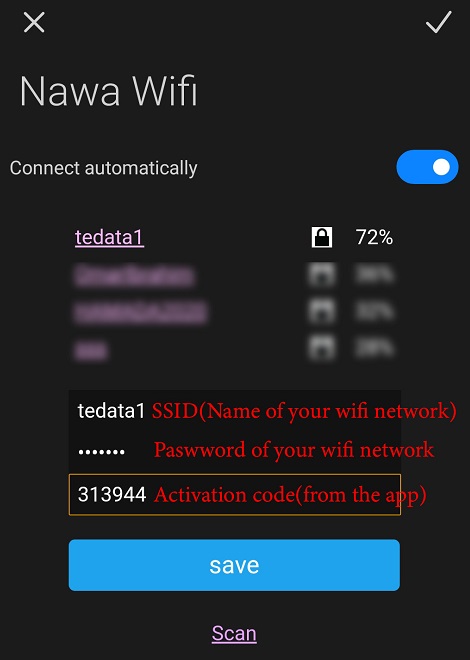
Step 2: Wifi credentials and activation code
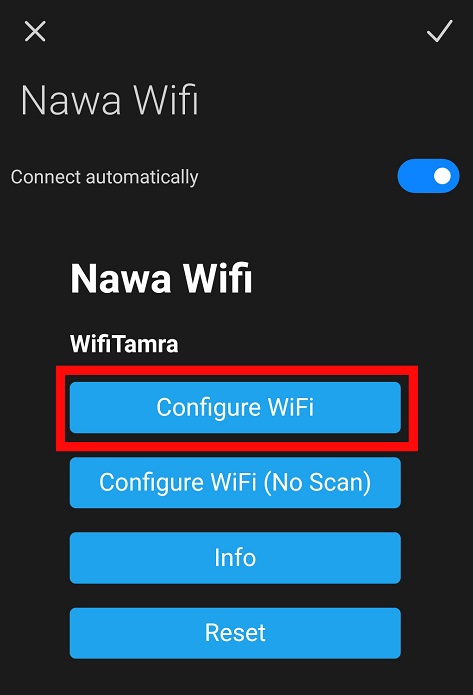
Upon connecting to Tamra-IoT Wifi, a new page should open in your browser.
If it doesn't automatically open, check this How to manually enter Wifi credentials guide.
When the page opens, choose the first option (Configure WiFi), which opens a new page that will ask you to enter the SSID and Password you want to connect to, and the Activation Code given to you on the application.
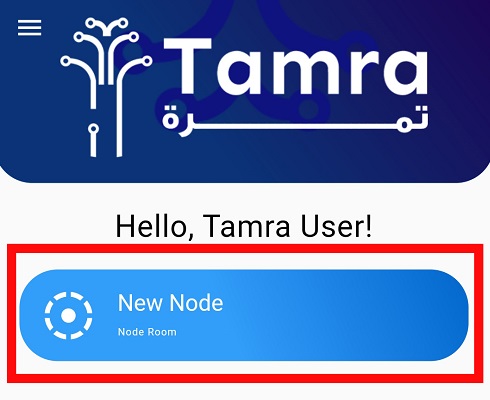
To make sure you've properly applied this step:
- You should now be connected to your original Wifi
- Nawa Wifi should disappear from your wifi list
- When you open your application, you should find a New Node colored in Blue (meaning that it's active).
If the new node isn't activated yet, try to close the application and reopen it. Also, try to restart the board by removing the usb cable from your laptop and reconnecting it.
Congratulations! You have completed the setup process, and now you are ready for the next step.
If your WIFI password is long (more than 16 characters), you may need to repeat these steps every time you connect the board.